Mastering Candlestick Signals: Doji, Engulfing & Hammer for Forex and Crypto Traders
Introduction
Candlestick charts are the visual language of price action. Whether you trade EUR/USD, GBP/USD, or BTC/USD, recognizing key formations can give you an edge in spotting reversals, continuations, and optimal entry points. This article dives deep into three of the most actionable patterns—doji, engulfing, and hammer—and shows how to combine them with multi‑timeframe analysis, risk management, and prop‑firm evaluation criteria such as the Funded Ocean Challenge.
1. The Anatomy of a Candlestick
A single candlestick conveys four price points: open, high, low and close. The body (open‑to‑close) reflects market sentiment, while the wicks (high‑low) reveal the extremes of price action during the period. Understanding the proportion between body and wicks is the first step to decoding any pattern.
- Long body – strong directional bias.
- Short body – indecision, often a precursor to a change.
- Upper wick longer than lower – sellers pushed price down after a high.
- Lower wick longer than upper – buyers reclaimed the market after a low.
These fundamentals apply equally to forex trading and crypto trading, making candlesticks a universal tool.
2. Doji – The Neutral Signal
What a Doji Looks Like
A doji forms when the opening and closing prices are virtually equal, creating a cross‑shaped candle. The most common variants are:
- Standard Doji – equal open/close, short wicks.
- Long‑legged Doji – long upper and lower wicks, indicating high volatility.
- Dragonfly Doji – long lower wick, no upper wick (potential bullish reversal).
- Gravestone Doji – long upper wick, no lower wick (potential bearish reversal).
How to Trade Dojis
- Identify the Trend – A doji in an uptrend signals possible exhaustion; in a downtrend it may hint at a bottom.
- Confirm with the Next Candle – Look for a candle that closes beyond the doji’s high (bullish) or low (bearish).
- Set Stop‑Loss – Place it just beyond the opposite wick to protect against false breakouts.
Practical Example (EUR/USD 4‑Hour)
On a 4‑hour chart, the pair was climbing from 1.0800 to 1.0900. At 1.0875 a long‑legged doji appeared, followed by a bearish engulfing candle that closed below the doji’s low. A short‑term short position was entered with a stop‑loss 15 pips above the doji’s high, yielding a 45‑pip profit.
3. Engulfing – The Power Move
Bullish vs. Bearish Engulfing
- Bullish Engulfing – A small bearish candle followed by a larger bullish candle that completely covers the prior body. It signals a shift from supply to demand.
- Bearish Engulfing – The opposite: a small bullish candle swallowed by a larger bearish candle, indicating a shift from demand to supply.
Trading Rules
- Trend Context – Use engulfing patterns at the end of a clear trend or after a consolidation zone.
- Volume Confirmation – Higher volume on the engulfing candle adds conviction (especially on crypto where volume spikes are pronounced).
- Risk Placement – For bullish engulfing, place the stop‑loss just below the low of the engulfing candle; for bearish, above the high.
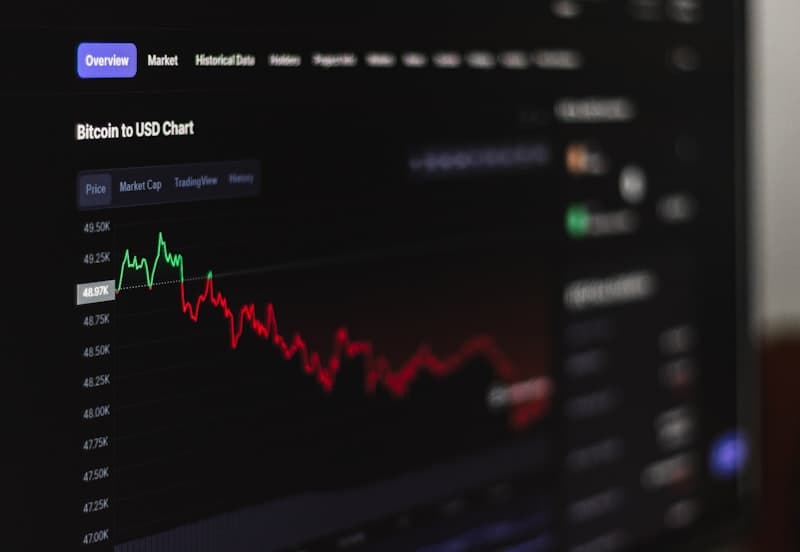
Practical Example (BTC/USD Daily)
On a daily chart, BTC/USD rallied from $28,000 to $31,500. A bullish engulfing appeared on the 28th, with the second candle closing 1,200 points above the first’s high. Entering a long position at $30,800 and setting a stop‑loss at $29,900 resulted in a 1,700‑point gain as the price surged to $32,500.
4. Hammer & Hanging Man – The Wicks That Matter
Visual Differences
Both have small bodies and long lower wicks, but context decides their meaning:
- Hammer – Appears in a downtrend; the long lower wick suggests buyers are stepping in, foreshadowing a bullish reversal.
- Hanging Man – Appears in an uptrend; the same shape now warns of potential bearish pressure.
Trade Execution
- Identify the Trend – Confirm the hammer/hanging man is at a swing high (hanging man) or swing low (hammer).
- Wait for Confirmation – A close above the hammer’s high (bullish) or below the hanging man’s low (bearish) solidifies the signal.
- Stop‑Loss Placement – Below the low of the hammer for longs, above the high of the hanging man for shorts.
Practical Example (GBP/USD 1‑Hour)
During a rapid pullback from 1.2800 to 1.2750, a hammer formed at 1.2765 with a lower wick extending to 1.2720. The next hour closed at 1.2790, confirming the reversal. A long trade was placed at 1.2770 with a stop‑loss at 1.2725, netting 45 pips before the pair resumed its uptrend.
5. Multi‑Timeframe Confirmation
Relying on a single timeframe can lead to premature entries. Combine a higher‑level chart (daily or 4‑hour) to define the primary trend, then zoom into a lower timeframe (1‑hour or 15‑minute) for precise entry using the candlestick patterns.
Example Workflow
- Daily Chart – Identify a bullish trend on EUR/USD.
- 4‑Hour Chart – Spot a doji near a key support zone.
- 15‑Minute Chart – Look for a hammer confirming the reversal.
- Enter – Align the trade with the higher‑timeframe bias, set stop‑loss based on the 15‑minute candle’s low, and target the next resistance.
This layered approach reduces noise and improves the risk‑reward ratio, a crucial factor for any prop firm evaluation.
6. Applying Candlestick Mastery to Prop‑Firm Evaluations
Prop firms such as Funded Ocean assess traders on consistency, drawdown limits, and profit targets. Using candlestick patterns can help you meet those criteria:
- Consistency – By trading only high‑probability setups (e.g., engulfing with volume confirmation), you increase win‑rate across the evaluation period.
- Drawdown Control – Precise stop‑loss placement based on candle wicks keeps drawdowns within the tight limits of the 1‑Step or 2‑Steps challenges.
- Profit Targets – Aligning candle‑based entries with major support/resistance zones enables you to hit the 10% profit target without over‑leveraging.
When comparing the best prop firm 2026, look for flexible rules and fast payouts—exactly what Funded Ocean offers through its Scale Plan, allowing traders to scale up to $3,000,000 as they prove profitability.
7. Risk Management Tips Tailored to Candlestick Trading
- Position Sizing – Risk no more than 1‑2% of your account on any single candle‑based trade. Use a simple calculator to adjust lot size based on stop‑loss distance.
- ATR Filter – Apply the Average True Range (ATR) to avoid trading hammers during low‑volatility periods; a high ATR confirms that the long wick is meaningful.
- Session Awareness – Doji and hammer patterns often form during session overlaps (e.g., London‑New York). Align your trades with the most liquid periods for tighter spreads.
- Journal Everything – Record the pattern, timeframe, entry, stop‑loss, and outcome. Over time, you’ll refine which setups work best for your style and for the Funded Ocean Challenge criteria.
8. Final Analysis
Candlestick patterns are more than decorative chart elements; they are concise summaries of market psychology. By mastering the doji, engulfing, and hammer, you gain a reliable toolkit for both forex trading and crypto trading. Combine these patterns with multi‑timeframe confirmation, disciplined risk management, and an awareness of prop‑firm evaluation rules, and you create a repeatable, high‑probability trading strategy.
Whether you are aiming to pass the Funded Ocean 1‑Step evaluation, scale up through the Scale Plan, or simply improve your personal account performance, integrating candlestick analysis into your daily routine is a proven path to consistent profits.
Published by the Funded Ocean Team.
More articles
Suggested reads from the blog
Mastering Support and Resistance on EUR/USD & GBP/USD: A Practical Guide for Forex Traders
·Technical Analysis
Mastering Intraday Pivot Points: How to Calculate Daily, Weekly and Monthly Levels for Forex and Crypto
·Technical Analysis

Detecting False Breakouts: A Forex Trader’s Checklist to Stay Out of the Trap
·Technical Analysis

Mastering Harmonic Patterns: A Practical Guide to Gartley, Butterfly, and Bat Setups for Forex Traders
·Technical Analysis